How to draw bubble letters
Bubble letters are not a special alphabet, they are any letter puffed up like a balloon. Draw the plain letter first, wrap a fat rounded outline around every stroke, and the balloon shape appears on its own.
- 6 steps
- 8 minutes
- 4-10 Ages
- Easy

How do you draw bubble letters?
Sketch the plain letter lightly as single pencil lines. Trace a fat, even outline the same distance out from every line, then round off the ends and corners so it puffs up. Rub out the pencil skeleton, add a soft shadow behind, and colour it in. Six steps, and the same six work on any letter.
Watch it drawn, line by line
The whole drawing in under half a minute, in the same order as the steps below. No sound, so play it anywhere.
Draw it step by step
The new lines for each step are drawn in red. The grey dashed shapes are guides, sketch them lightly and rub them out at the end.
-
1 Step 1: Letter skeleton
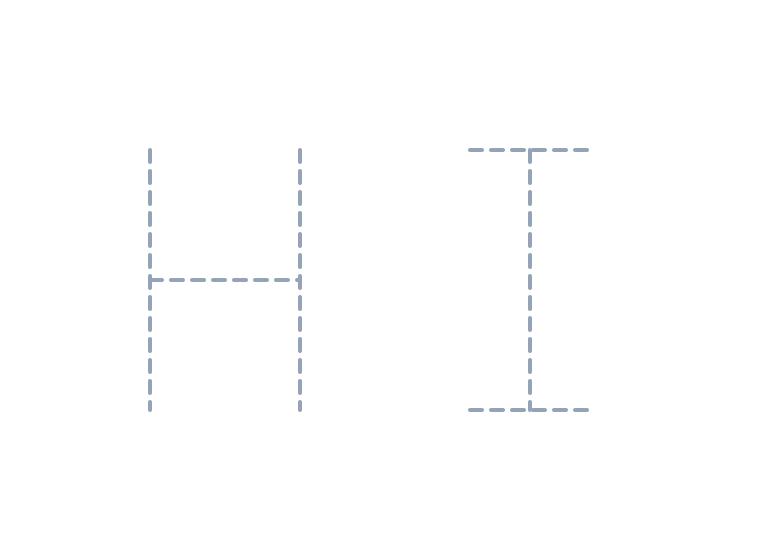
Lightly sketch the plain letters as thin pencil lines, just single strokes: two uprights and a bar for the H, one upright with a short top and bottom bar for the I.
-
2 Step 2: Fat outline
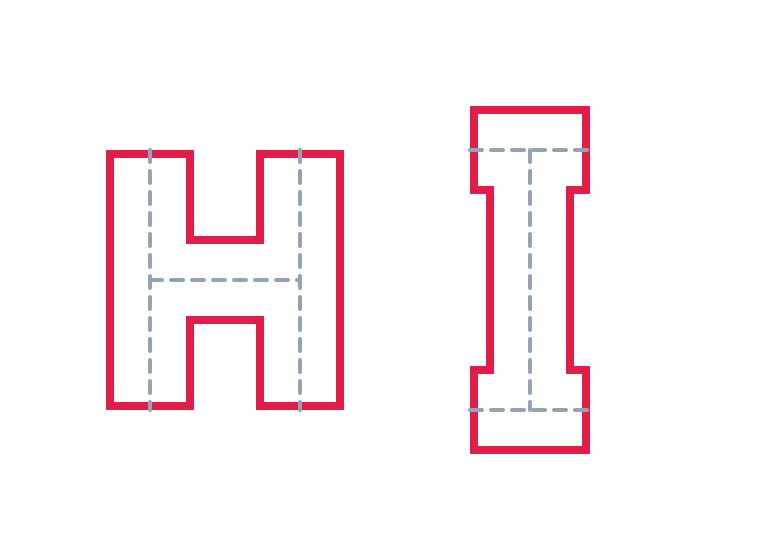
Trace a fat, even outline the same distance out from every pencil line. Keep the ends square for now, so each letter looks like a chunky padded block.
-
3 Step 3: Round the corners
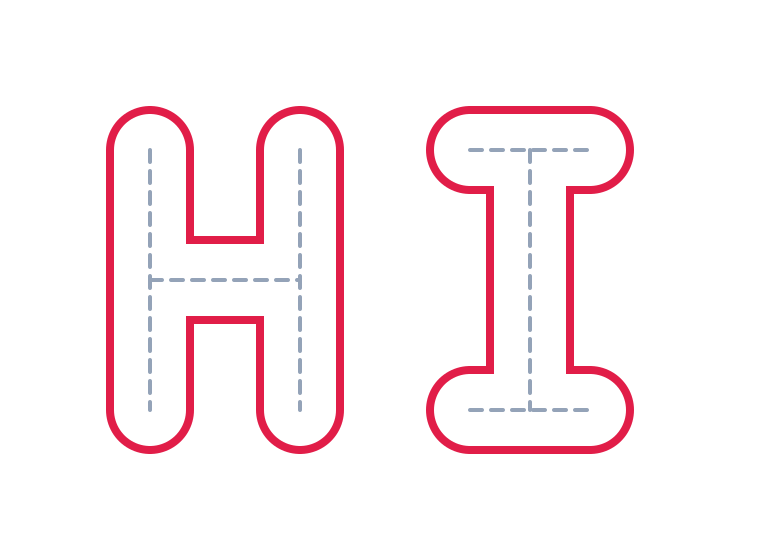
Redraw the outline with rounded ends and soft corners so the letters puff up like balloons. This rounding is what turns a blocky outline into bubble letters.
-
4 Step 4: Erase the skeleton
Rub out the grey pencil skeleton inside. You are left with two clean, hollow bubble letters, just the dark outline and white space inside.

-
5 Step 5: Add a shadow
Add a soft grey shadow tucked behind the letters, down and to the right. That one offset shape lifts the flat outline off the page and makes it look rounded.

-
6 Step 6: Colour it in
Colour the letters in, a warm yellow H and a bright blue I, and leave a small white shine on each. The dark outline and shadow stay, and the balloon look is done.

What do you need to draw bubble letters?
A pencil, an eraser and one sheet of paper, plus something to colour with at the end. Bubble letters are the one thing on this site where a ruler actually hurts: the charm is in the soft, wobbly outline, so draw freehand and let the curves be a little uneven.
Where do you start?
With the plain letter, drawn lightly as single pencil lines. In this lesson we build the word HI, so that is two uprights and a bar for the H, and one upright with a short top and bottom bar for the I. These thin lines are the skeleton. They are a guide, not the drawing, so press softly and keep them small, because the fat outline grows outward from them and needs room.
What is the hardest part of drawing bubble letters?
Keeping the outline an even distance from the skeleton the whole way around. The trick is to imagine a fat, round pen following each pencil line: the outline should sit the same distance out on every side, top, bottom and both edges. When one side bulges more than the other the letter looks lumpy instead of inflated. Trace it blocky first, with the same gap everywhere, and only then round the ends.
The second thing is spacing. Because each letter puffs outward, plain letters drawn close together will collide once they are fat. Leave a wide gap between them at the skeleton stage, wider than looks right, and the bubbles will just meet as they fill out.
How do you make it your own?
- Write any word. The exact six steps work on every letter of the alphabet, and on numbers too. Round letters like O and S are the easiest to start with.
- Change the colours. One colour per letter, a rainbow across the word, or a pattern of dots and stripes inside each shape.
- Add an outline glow. Draw a second thin line a little outside the dark outline, following it all the way round, for a sticker look.
- Make them 3D. Instead of a soft shadow, pull straight lines back from every corner to a matching letter behind, and the word turns into solid blocks.
What else is worth knowing about bubble letters?
Bubble letters are a cousin of graffiti lettering, where artists call this rounded style throw-ups, because a whole word can be painted fast. The idea is older than spray paint, though: illuminated manuscripts fattened and decorated their capital letters by hand hundreds of years ago. What they all share is the trick you just used, the letter is drawn normally first and the decoration is wrapped around it afterwards, never the other way round.
Questions people ask about drawing bubble letters
Is this good for a young child?
Yes. The skeleton is just straight pencil lines, and the fat outline is forgiving, because a wobble reads as part of the balloon shape. A younger child may want help keeping the outline an even width, which an adult can trace over.
How long does it take?
About eight minutes for a short word once the letters are familiar. The outline is the slow part; the colouring at the end is quick.
How do I write a whole word in bubble letters?
Draw every plain letter first, spaced well apart, then fatten them one at a time. Doing all the skeletons before any of the outlines is what keeps the spacing even across the word.