How to draw a spider
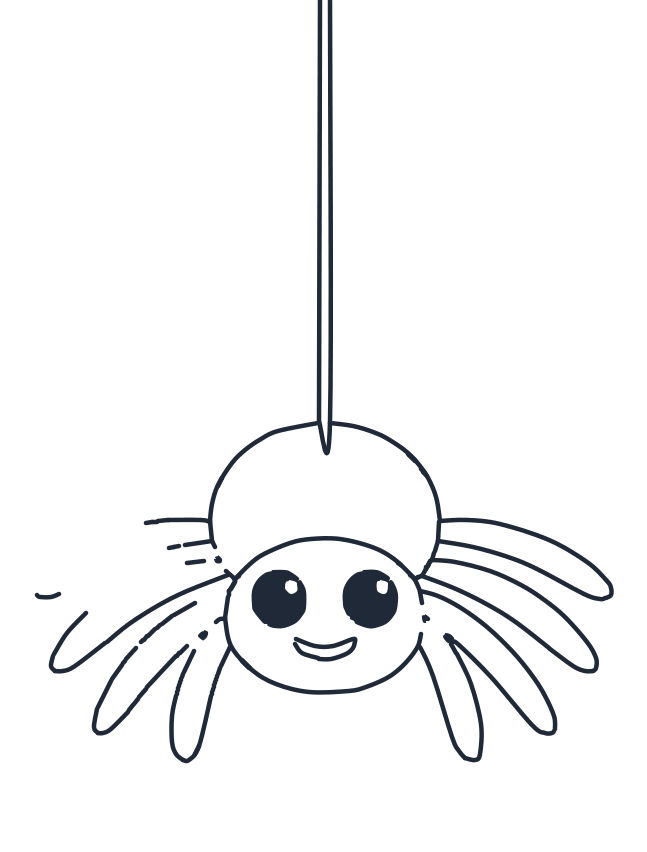
A hanging spider is two round shapes on a thread: the big body on top and the smaller head with the face under it. Trace the guides, add the eyes and the smile, drop the silk thread in, and build the eight curved legs a few at a time.
- 9 steps
- 11 minutes
- 4-10 Ages
- Easy
How do you draw a spider?
Sketch two overlapping guide ovals, a big one on top for the body and a smaller one under it for the head. Draw the head, then the round body above it, and add the big eyes and the smile. Hang the spider from a double silk thread and finish with the eight curved legs. Nine steps.
Watch it drawn, line by line
The whole drawing in under half a minute, in the same order as the steps below. No sound, so play it anywhere.
Draw it step by step
The new lines for each step are drawn in red. The grey dashed shapes are guides, sketch them lightly and rub them out at the end.
-
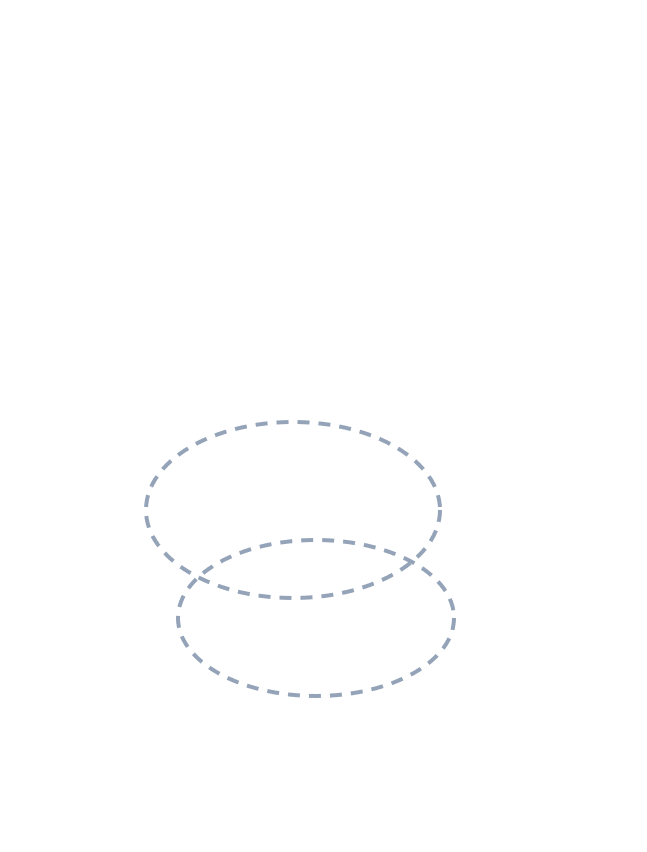
1 Step 1: Guide shapes
Lightly sketch two overlapping ovals. The top big oval is for the body, the lower smaller oval is for the head.
-
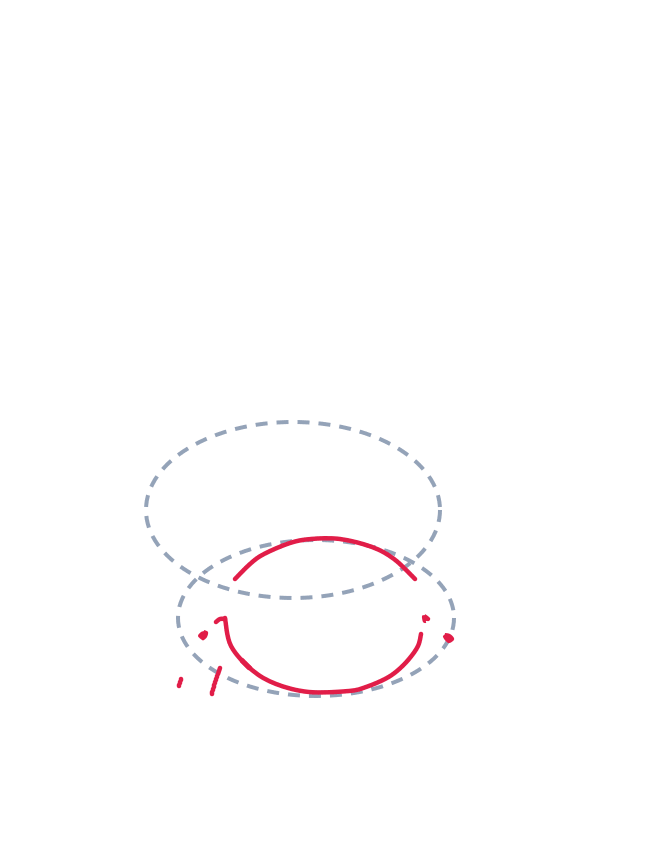
2 Step 2: The head
Trace the lower oval into a neat circle for the head.
-
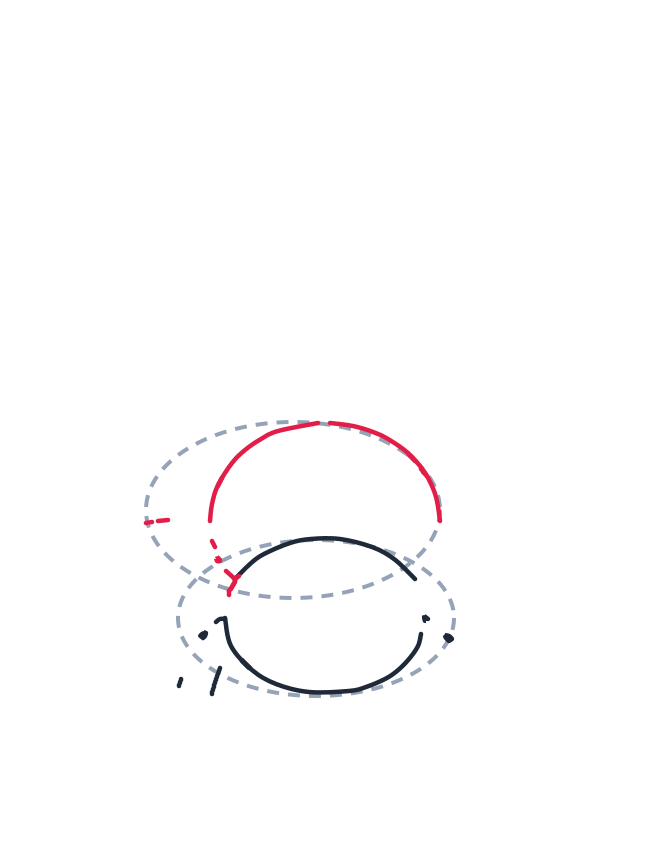
3 Step 3: Big body
Draw a large curved oval for the body using the top guide, stop where it touches the head.
-
4 Step 4: Eyes and smile
Add two big circles for eyes on the head, then a small curved U shape for the smiling mouth.

-
5 Step 5: Silk thread
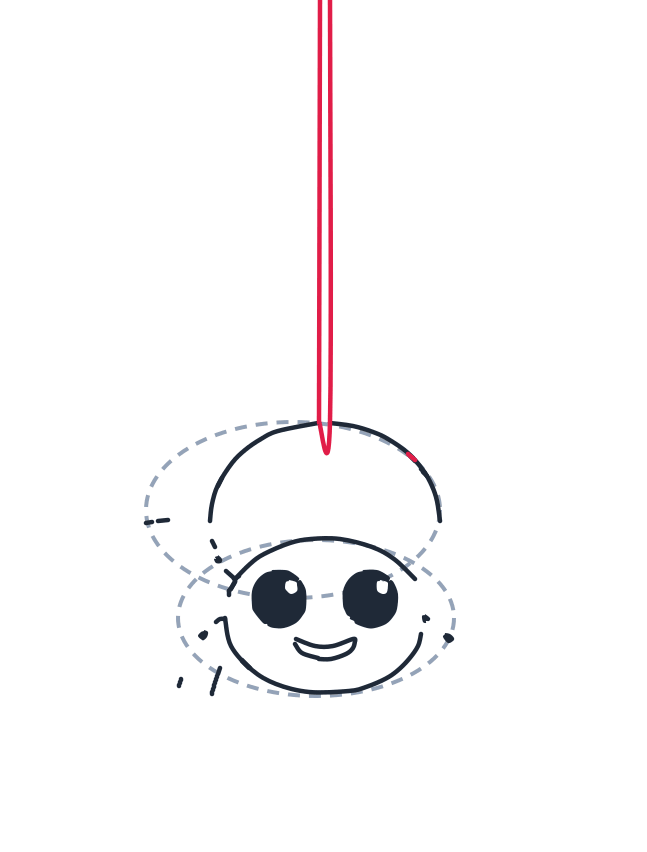
Draw two straight vertical lines down from the top, ending in a tiny U shape where they touch the body.
-
6 Step 6: First front legs
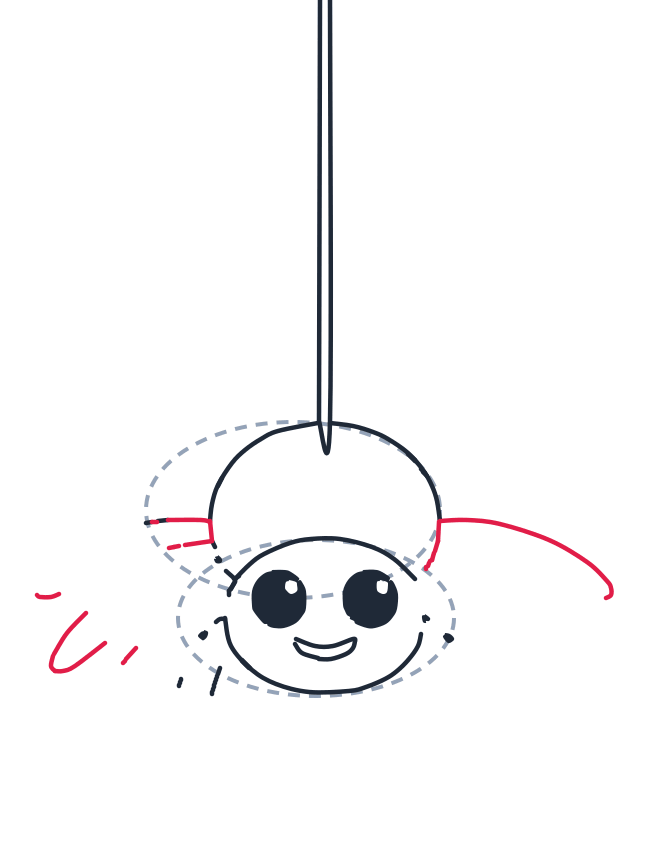
Draw a short curved leg on the left side of the body. Draw a long curved leg on the right, arcing outward.
-
7 Step 7: Second legs
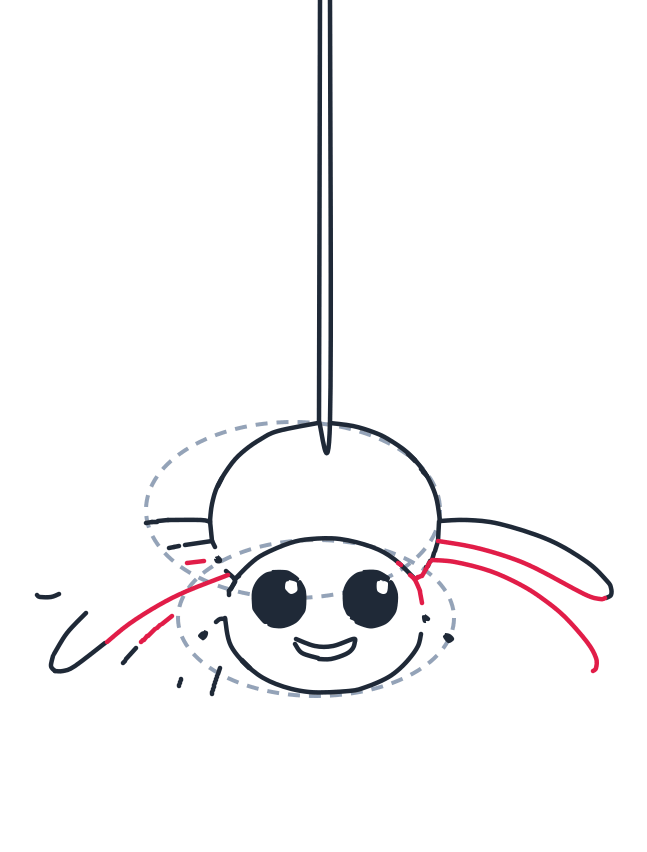
Add a long curved leg on the left, sweeping down. Add another curved leg on the right just below the first right leg.
-
8 Step 8: Third right leg
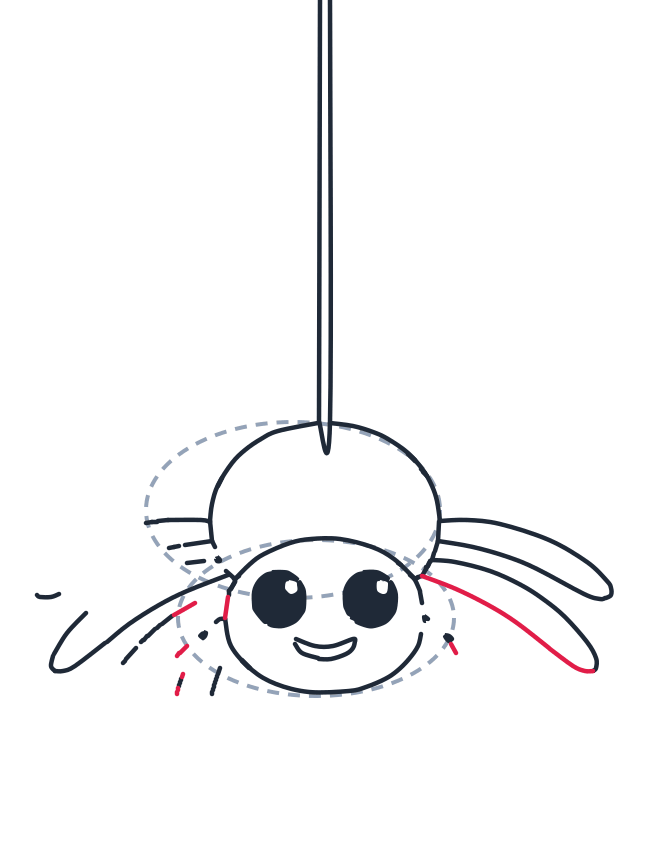
Draw a third long curved leg on the right, lower than the others.
-
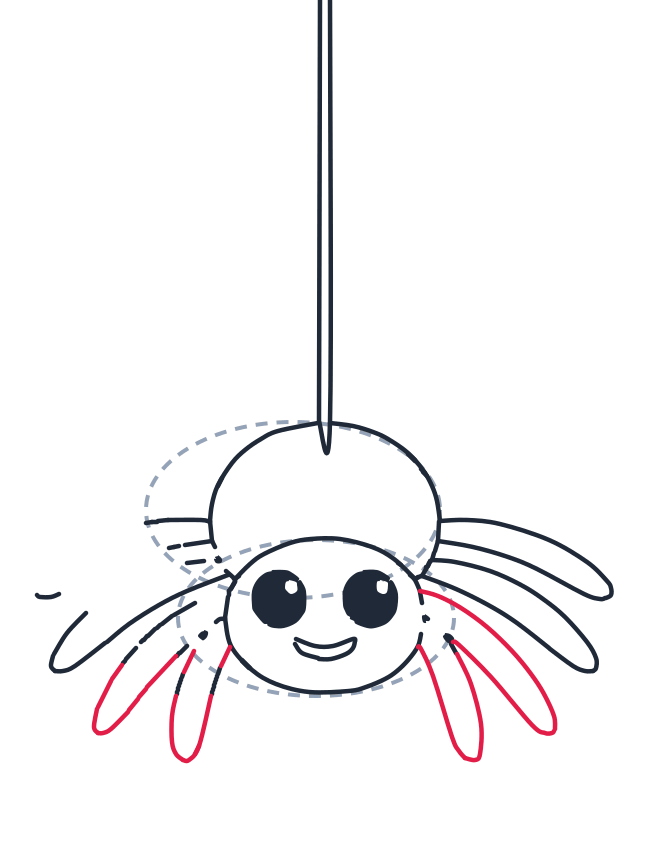
9 Step 9: Bottom legs
Add two long curved U shapes for the bottom legs on the left. Add two matching curved U shapes for the bottom legs on the right.
What you need
A pencil, paper and an eraser, plus something to colour with at the end. Nothing in this drawing needs a steady hand: every single line is a curve, and a spider with slightly wobbly legs only looks more alive.
Before you start
Sketch the two grey guide ovals lightly, overlapping: the big one on top is the body and the smaller one under it is the head. That order sounds upside down and it is not. This spider hangs from a thread, so the body goes on TOP and the face sits UNDER it, looking straight at you. Put the face on the big top shape instead and you have drawn a balloon on a string.
The part most people get wrong
The legs, and the mistake is trying to draw all eight at once as four matched pairs. This tutorial never asks for that. The legs arrive one or two at a time across the last four steps, and the two sides are not mirror images: the upper legs are open curves that sweep out and down like umbrella ribs, while the bottom legs are closed U shapes, wide where they leave the body and rounded at the tip. Follow the red lines of each step and the tangle sorts itself out.
The second thing is the silk thread. It is not one line, it is two straight lines running side by side from the top of the paper down to the body, with a tiny point where they meet it. That little meeting point is what makes the spider look like it is really hanging instead of floating in front of the thread.
Make it your own
- Give it a web. A few straight lines fanning out of one corner of the paper, joined by curved lines between them, and your spider is home.
- Add more eyes. Most real spiders have eight. Two or three small dots above the big pair turns cute into true.
- Colour it friendly. Purple, green or blue keeps it a storybook spider. Black with an orange background turns the same drawing into a Halloween decoration.
- Make it itsy bitsy. Shrink the spider, stretch the thread the whole height of the paper and add a few rain drops beside it.
Learn more about spiders
The thread you drew comes from the back tip of the body, not from the head, which is why a real hanging spider dangles exactly like your drawing, body up and face down. That silk is, weight for weight, stronger than steel, and a spider can produce several kinds, sticky for trapping and dry for walking on. And a spider is not an insect: insects have six legs, spiders have eight, which is exactly why this tutorial spends four whole steps on them.
Questions people ask about drawing a spider
Is this a good first drawing for a 4 year old?
Yes. Nine short steps, the two guide ovals do all the placing, and no leg has to match any other leg, so there is nothing to get wrong twice.
How long does it take?
About eleven minutes the first time. The legs fill four of the nine steps, but each one is a single curved stroke, so the second half of the tutorial goes faster than it looks.
How do I make it cute instead of scary?
Big eyes, a small smile and fat rounded legs. Keep the eyes huge with a white glint, keep the smile, and the spider stays friendly in any colour you choose.